Configuring PowerStandings – An Introduction
What needs to be done to setup PowerStandings?
PowerStandings is a powerful gamification platform that gives you the power to motivate your agents by bringing out their competitive edge.
This article covers various aspects on how to get your PowerStandings setup and running in Salesforce.
The first steps for getting your PowerStandings system up and running are:
- Setting up your user licenses
- Setting up your KPIs
- Setting up PowerStandings teams. These group your Salesforce users and user roles together for charting leaderboards and competitions
- Powerstandings Sidebar Setup
- Setup display monitors for your leaderboards
Once you’ve completed these 5 setup steps you are ready to move on to achievements and challenges
Setting Up User Licenses
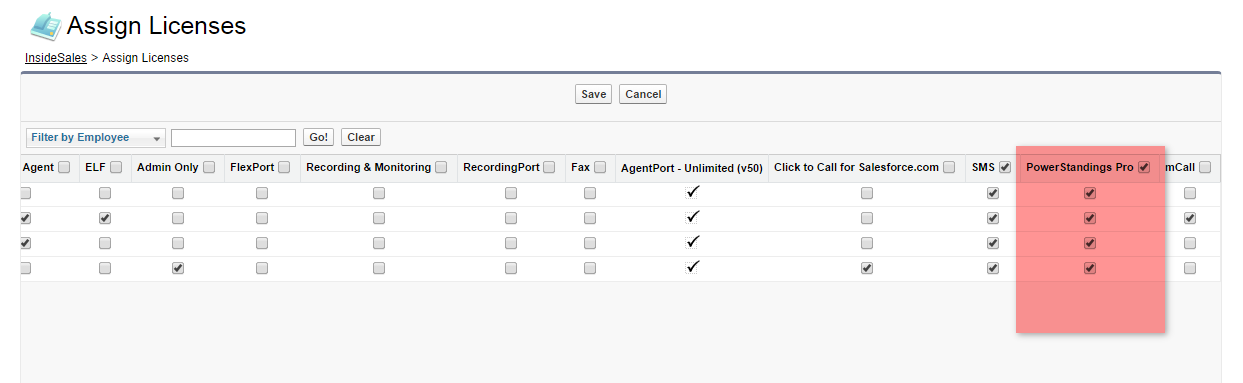
Head over to your InsideSales tab in Salesforce, and click the License Assignmentslink in the User Management heading. Find the PowerStandings Pro checkboxes in the employee list, and start selecting the users you want to have a PowerStandings license.
Remember you can filter the employee list by name or role to hunt down specific users.
Setting Up KPIs
Once you’ve assigned your users’ licenses, you’ll next want to verify the PowerStandings system KPIs (Key Performance Indicators). By default we include approximately two dozen default KPIs. Head back to your InsideSales tab, and click the Key Performance Indicators link under the PowerStandings > Settings heading.
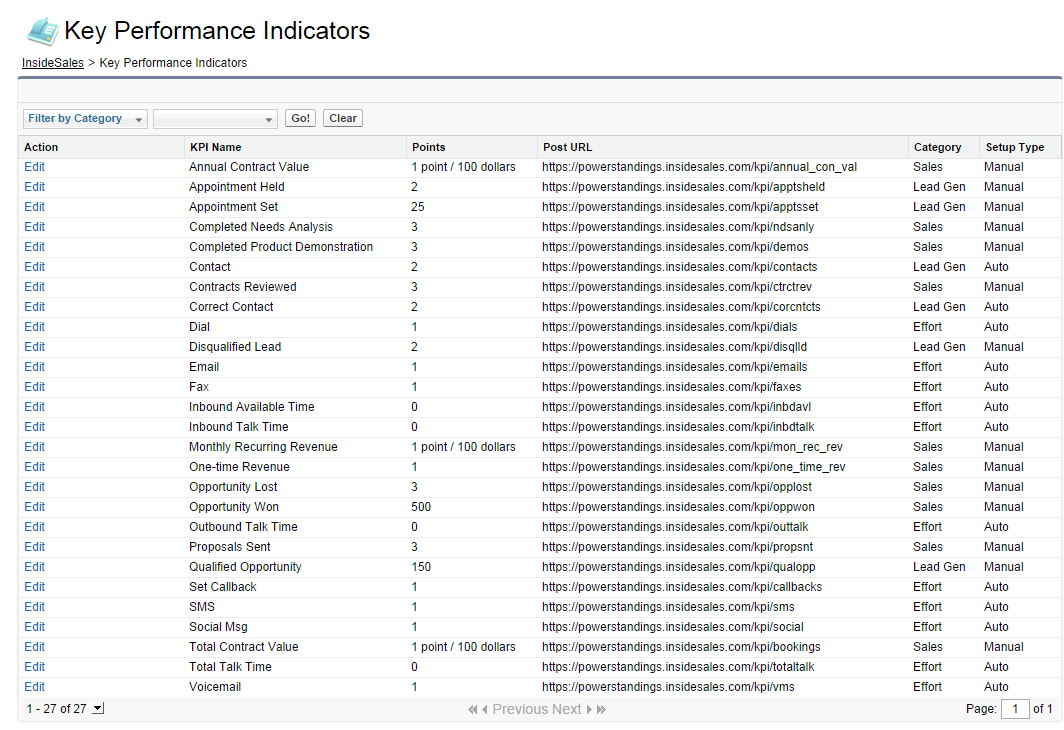
Ultimately there are two things you need to determine:
- The PowerStandings ‘Points’ value for each KPI
- The action your reps take in Salesforce that trigger the PowerStandings data ‘push’
KPI Points
‘Points’ are a way of creating a weighted value for different KPIs in calculating effectiveness. For example, in many organizations setting an appointment with a prospect would be seen as more valuable than simply making a lot of phone calls. In this case you might want to weight the value of a set appointment as 25 times more important than a single phone call.
Point values for each KPI are set individually in the KPI settings.
Points vs. KPI Tallies
Note that KPI points are tracked independently of the KPI tally. Meaning, we always give you the option of tracking the points values for work your agents do, or tracking the raw KPI numbers.
For example, Janet has accumulated 175 points today, by setting 4 appointments (worth 25 points each) and making 75 calls (worth 1 point each). In your PowerStandings reports, leaderboards, and dashboards you can choose to track the total points, or the actual tallied KPI.
KPI Data ‘Push’ Using Salesforce Workflow Rules
PowerStandings performs its database activity in a third-party system. To get the data from Salesforce into the PowerStandings engine, you’ll need to set up Salesforce Workflow Rules that correlate to the appropriate KPI(s).
Notice in the KPI settings the Post URL setting. This is the location where you’ll instruct a workflow rule to send a notification when the rule triggers.
Workflow Rules
You can setup rules that match an agent’s activity to a PowerStandings KPI. Any time an agent performs that action, the workflow rule will ‘ping’ the PowerStandings URL, and increment a data tally based on the event.
PowerStandings Teams
The basic idea for setting up a PowerStandings team is to meaningfully group together your agents for comparison and competition. All team settings are designed to improve manager reporting and give reps a better view into their performance – both on their own, and in comparison to other relevant team members.
PowerStandings Sidebar Setup
The PowerStandings sidebar component is enabled directly within Salesforce.
- Click on Setup within Salesforce
- Search for Home Page Layouts
- Edit the desired Home Page Layout
- Check the PowerStandingsSidebar checkbox (do not select the PowerStandings checkbox, this is a legacy option that will be removed in the future).
- Click Next
- Click Save
To have the PowerStandings Sidebar widget available on all pages:
- Click on Setup within Salesforce
- Search for User Interface
- Check the Show Custom Sidebar Components on all Pages checkbox
- Click Save
