Add “Create List” and “Manage List” Buttons to Layout
How and Why you should add the “Create List” and “Manage List” buttons to a list view layout to create one-time use (Domino) lists?
A PowerDialer Domino List can be created based on selected values from a list view in Salesforce Classic. This is a great feature that empowers users to create and manage their own calling lists based on the List Views they already see in Salesforce.
Imagine a Sales Rep has several List Views that represent different verticals. The Sales Rep can open a List View, select specific records or all the records from the List View, and click the “Create List button” to generate a Domino List based on the selected records. They can then use the “Next Record” button to quickly call through all those records without having to keep coming back to the List View.
Adding the ‘Create List’ and ‘Manage Lists’ Buttons to a List View
To Add ‘Create List’ and ‘Manage Lists’ to the Layout:
- Go to Salesforce ‘Setup’
- Expand ‘Customize’ on the left menu to expose all the objects
- Select the object where you want to add the buttons (Only Accounts, Activities, Cases, Contacts, Leads, or Opportunities objects)
- Click ‘Search Layouts’
- Edit ‘<Object> List View’
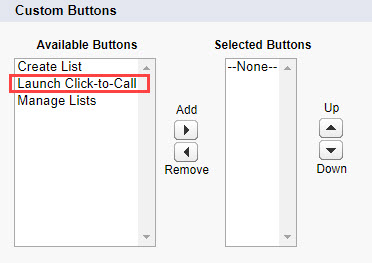
- Move ‘Create List’ and ‘Manage Lists’ to the selected column
- Save your layout changes
User Guidance
- Domino Lists created from list views have only two visibility settings: individual and company. They cannot be shared to a specific team.
- These buttons will be visible to the entire organization and cannot be restricted to specific users. (Salesforce Article: Customize Search Layouts)
- Lists created with the ‘Create List’ button can only be managed by the ‘Manage Lists’ button. They will not appear in the InsideSales tab in Salesforce.
- The ‘Launch Click-to-Call’ and second ‘Create List’ buttons should not be added to the list view layout as they will not function correctly.
To Set a List View List:
- Navigate to the Accounts, Activities, Cases, Contacts, Leads, or Opportunities tab in Salesforce
- Select or create a List View
- Check the box next to any records you would like to be in the list
- Click the ‘Create List’ button
- Enter a name and select the desired settings for the list
- Click ‘Activate’
When to use the Manage List button
Static lists created with the ‘Create List’ button can only be launched or purged once they are created. They cannot be reset or edited.
To Use the Manage List button to edit, launch or delete an existing static list:
- Navigate to that object tab in Salesforce
- Load any list view
- Click the ‘Manage Lists’ button
- Find the desired list from within the popup window
- Click the ‘Load’ or ‘Purge’ link on the desired list
